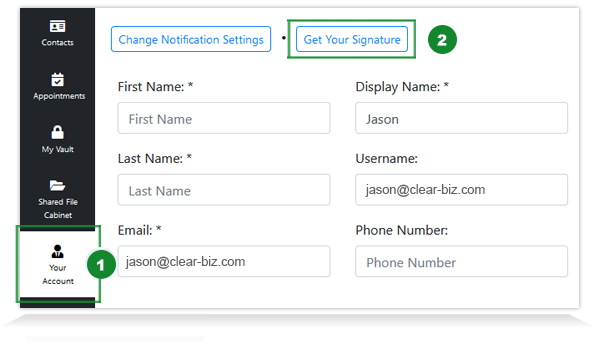
Step 1 - Log into Secure Cloud Send
Log into your Secure Cloud Send account and from the main sidebar, click 'Your Account' (1) and then 'Get Your Signature' (2).
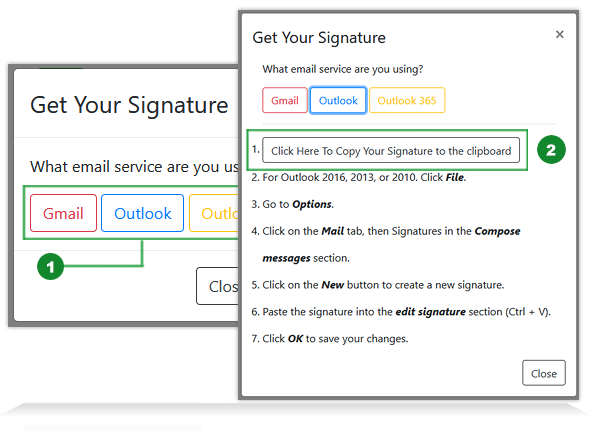
Step 2 - Get Your Secure Upload Link
Click on the email application of your choice; Outlook, Outlook 365 & Gmail/G Suite (1).
Click 'Click here to copy...Signature to clipboard' (2) - this button includes your unique secure file upload link in the form of a small banner image. For safekeeping, you can copy and paste link to a text file (i.e. Notepad) to be used later.
Depending on which email application you selected, a series of instructions are listed to help guide you on how to add link to your email signature.
Step 3 - Add Secure File Upload Link to Email Signature
Select an email application and follow the steps on how to add Secure File Upload link to your email signature.
MS Outlook MS Outlook 365 Gmail/G Suite CAN
CAN  USA
USA
